


ADA Step-by-Step Layout of Takashi Amano
A step-by-step aquascaping description of how Takashi Amano aquarium design. A small basic explanation for the planting of aquarium plants and starting the construction of an aquarium. Follow each step and see how a beautiful aquascape to come.
 |
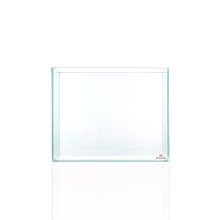
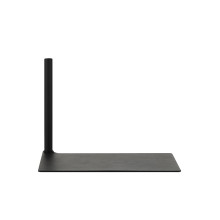
1. The 90cm aquarium with substrate filled. First of all, Bacter100 applied together with Power Sand Special M. The Aqua Soil Amazonia light in the rear is slightly higher and runs diagonally down for a better depth effect. Then the soil was leveled and voids filled. And a layer of Aqua Soil Powder as a top layer makes the substrate completely. |
 |
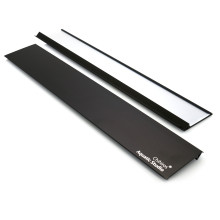
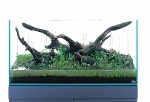
2. In an open aquarium, the wood on the top side sticking out. If that is not possible, there must be adjustments to be made. Also a number of smaller roots can be combined together to create the illusion of 1 big carrot to induce. |
 |
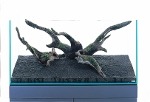
3. Here are 2 additional pieces of roots in the aquarium inserted that the basis for this layout is placed. This is taken into account that there is enough space on the bottom left for aquarium plants. Where necessary, the substrate more flat ironed. |
 |
4. At this stage, is the substrate damp. So get the Aqua Soil will be able to suck with water. This is to prevent Substrate particles to the surface float. |
 |
5. Caution is the aquarium filled with water up to the substraathoogte along the windshield. There is prevented that the carefully uitgevlakte substrate opdwarrelt. First of all the plants around the roots is applied. These are easily planted in the damp Aqua Soil. |
 |
6. Around the roots, and the middle zone of the aquarium to be Cryptocorynes planted. The plants easily and carefully to plants is the Grip Type tweezers with a real outcome. |
 |
7. Then Cm novaezelandiae in the foreground were planted. The plants out of their pots removed and divided into small portions. Because this plant grows slowly, is this close together made. |
 |
8. The foreground is finished, and the water is gently supplemented until the substrate on the rear window under water. Use is made of various types of background vegetation. To the stengelplanten to highlight and lines, small bamboo sticks are used. |
 |
9. When applying the achtergrondbeplanting the plants are always from front to back, made. First is the relatively small Micranthemum micranthemoides gently with a pair of tweezers and planted. |
 |
10. Directly behind it is Micranthemum umbrosum planted at the back. This plant species can the best not too far from each other to be planted, so that will be a beautiful, rich forest, and not too much empty space. |
 |
11. For the contrast, it is advisable to have a few red stengelplanten in the middle of the background. If the stems compact to be planted, later a beautiful full forest to the rear. |
 |
12. Rotala sp. "Green" is on the right side of the back planted. Now there are left and right beautiful bright green stengelplanten to find as a nice contrast to the red stengelplant in between. |
 |
13. The overall impression continue to give shape, here and there, some Eleocharis be found in the background made. This plant is a pretty thin veil, and increases the optical joint impression of the other aquarium plants. |
 |
14. Now there is a few parts of the roots Microsorum sp. "Narrow" is applied. This has as effect that the roots are more in the whole be included. In addition to masking we set the diameter of the roots with which it is built, and is still one whole. |
 |
15. The dots on the i placed some cuttings Bolbitis heudelotii on the wood to tie with Wood Tight. The cuttings are placed on pointed pieces of the roots and in places where the overall composition of the aquascape. |
 |
16. Now all the planting is made is the aquarium afgevult with water. If the water become cloudy from the substrate, then the water must be careful to be uitgehaalt. The aquariumfilter is only taken into use if the water is beautifully clear. |
 |
 |
|
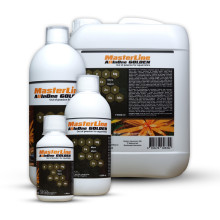
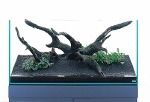
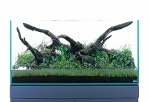
After the first week: A week after the set-up of the aquarium and the plants start to grow. The stengelplanten develop the first new shoots and the Cryptocoryne to begin the first new leaves to form. At this time, we start with the use of liquid plantenbemesiting STEP-1. It contains a balanced proportion of necessary trace elements, so that the aquarium plants healthy, new shoots and leaves can develop. |
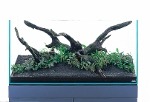
After two weeks: After two weeks, begin the old leaves of Cm sp. slowly yellow to be slow and will also leaves of the Cryptocoryne wilt. Dying and loose leaves need to be removed. Also will brown diatoms form on the leaves and the glass. Otocinclus sp. and Caridina japonica are the named animals to bet and the quantity in the hand. |
 |
 |
|
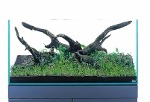
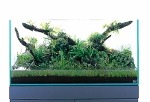
After three weeks - For the pruning of the aquarium plants Eleocharis be found and the fast-growing stengelplanten have in three weeks after the installation the surface of the water is reached. The aquariumplantensoorten Micranthemum sp. grow less well in the soft water, so there is almost every day 1/3 of the water in the period of 3 weeks to ensure proper hardness to obtain. Still growing Micranthemum slowly.
|
After three weeks - After the pruning of the aquarium plants The first prune of the stengelplanten should be very low. That increases the chance of a thick forest and so great dichtdeid of the plants are developed. At the same time, the slow-growing plants to the same height pruned. This will get all the plants back the incentive to new shoots to develop. Unwanted foothills of Eleocharis vivpara be removed. |
 |
 |
|
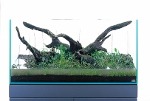
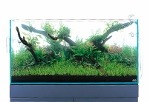
After two months - For the pruning of the aquarium plants The Cryptocorynes have very well-developed in the past 2 months and the whole scene looks very impressive. After more than a month after the interior design are a few of the fish used. Thanks to their faeces, and the load on the water, the bacteria and the plantenbiologie put in force. In this stage, the stengelplanten very beautifully developed, and we are approaching the final shape of the Layout. |
After two months - After the pruning of the aquarium plants For an aquarium with stengelplanten in the background, it is important to regularly prune. Only then the Layout is nice for a longer time. The roots may serve as a guide to the pruning for the correct height of the stengelplanten. Also when planting in the central zone, the roots can as a backbone for the cutting. The Layout is now complete and it is maintained with regular maintenance and adding liquid plant food. |
Watch this inspiring video of Takashi Amano:
More videos with useful Tips and Tricks are to be found in our YouTube channel: Link
See also the articles:
- Why choose ADA?
- ADA product guide